

Walking across a laminate floor only to feel a sharp ridge or a spongy, raised seam underfoot is an immediate source of frustration for any homeowner. What was installed as a smooth, continuous surface suddenly resembles a series of miniature speed bumps catching the afternoon light. Because laminate is an engineered floating floor rather than solid hardwood, its structural behavior is dictated by moisture absorption, environmental humidity, and thermal movement. When planks run into spatial restrictions or excessive water, the joints bear the brunt of that stress.
Fixing these distortions starts with recognizing that seam problems fall into two fundamentally different mechanical categories: peaking and bubbling. While they may look somewhat similar at a glance, their physical causes are completely opposite. Peaking is a structural movement problem caused by trapped lateral tension, while bubbling is a material failure caused by liquid penetrating the plank core. Applying the wrong remedy wastes time and can permanently ruin adjacent boards.
Distinguishing Between Peaking and Bubbling
Before picking up a tool, you need to diagnose exactly what has happened to the joint.
Peaking occurs when two adjoining planks push together with such force that their edges buckle upward, forming an inverted “V” peak. The protective clear wear layer remains intact, the photographic image beneath is undisturbed, and the surface feels hard. If you step firmly on a peaked seam, the ridge will often deflect downward slightly under your weight, only to spring back up when you lift your foot. This springiness confirms that the boards are under high lateral compression because the floating floor has run out of room to expand.
Bubbling presents entirely different characteristics. Instead of a uniform geometric ridge running down the seam, bubbling looks like puffy, raised, or blistered edges along the click-lock joint. The high-density fiberboard (HDF) core has absorbed water, swollen outward, and begun stretching or peeling the decorative melamine film. Stepping on a bubbled seam feels soft or crumbly rather than springy, and the plank will not press flat. Once the internal wood fibers swell from direct liquid exposure, the material itself has warped from within.
Resolving Peaked Seams by Restoring the Expansion Perimeter
Laminate floors are never anchored to the subfloor with nails or glue; they exist as a unified, floating membrane that naturally expands and contracts with changes in indoor temperature and relative humidity. To accommodate this continuous movement, installers must maintain an unobstructed expansion gap of roughly three-eighths of an inch around every wall, cabinet base, stair riser, and structural post.
When that perimeter gap is missing, inadequate, or blocked by debris, expanding planks run directly into framing lumber or drywall. Trapped with nowhere else to expand, the horizontal force travels inward until the weakest points in the floor—the interlocking tongue-and-groove joints—buckle upward in the middle of the room.
Locating the Hidden Pinch Points
Fixing a peaked seam rarely involves working directly on the joint itself. Instead, you must relieve the compressive stress at the perimeter so the floating floor can relax back into a flat plane.
Start by sighting down the line of the raised seam toward the walls on both sides. The obstruction is almost always located along the perimeter parallel or perpendicular to the run of the affected boards.
Carefully pry off the shoe molding or quarter-round along the nearest wall using a stiff putty knife and a small pry bar, taking care not to gouge the painted baseboard. Once the trim is removed, inspect the perimeter gap:
- Check if the edge of the laminate is jammed hard against the drywall or bottom wall plate.
- Look for spots where baseboard finish nails were driven downward at an angle through the edge of the laminate into the subfloor, effectively pinning the floating floor in place.
- Examine door casings to see if the jamb was under-cut properly or if the plank is wedged tightly against the rough framing.
- Inspect heavy built-ins, such as custom bookshelves or kitchen island cabinetry, that were installed directly on top of the floating floor, anchoring it to the subfloor.
Trimming Planks in Place with an Oscillating Multi-Tool
Once you identify where the flooring is binding against a wall or doorframe, you must trim away the excess material to re-establish the necessary expansion clearance.
The most efficient tool for this repair is an oscillating multi-tool fitted with a flush-cut wood blade. Set the depth stop so the blade cuts cleanly through the laminate plank without chewing into the structural subfloor beneath. Carefully trim back the binding edge of the flooring until you create a uniform three-eighths-inch gap between the edge of the plank and the wall stud or drywall plate.
Vacuum the cut channel thoroughly to remove all sawdust, splinters, and drywall particles, as trapped construction debris can continue to restrict plank movement. Once the pinch point is eliminated, the lateral tension releases. Over the next twenty-four to forty-eight hours, the peaked seam will typically settle flat on its own. You can gently accelerate the process by placing a clean towel over the joint and weighting it down with several heavy boxes or flat weights. Reinstall your perimeter moldings, ensuring that all nails are driven horizontally into the baseboard or wall studs rather than down into the flooring.
Addressing Moisture-Induced Bubbling and Core Swelling
While peaking is caused by mechanical binding, bubbling is almost exclusively the result of water intrusion. The core of a standard laminate plank consists of compressed wood fibers bound together with synthetic adhesives. When standing water penetrates the microscopic seam between planks—whether from an unnoticed pet accident, an overwatered houseplant, a leaking appliance, or aggressive wet mopping—those wood fibers drink up the water through capillary action.
As the fibers hydrate, they expand in volume, pushing the factory edges upward and destroying the smooth surface profile.
Assessing Minor Versus Catastrophic Swelling
If you catch a moisture spill immediately and the swelling is subtle, you may be able to rescue the board before permanent core expansion takes place:
- Wipe away every trace of surface moisture with absorbent microfiber towels.
- Position a high-velocity air mover or household oscillating fan to blow directly across the damp joint. Run a dehumidifier in the room to lower the ambient relative humidity below forty percent, which encourages deep evaporation from the seams.
- Once the floor is thoroughly dry, place a clean, dry, folded cotton towel over the raised seam. Set a standard household iron to medium heat with the steam function completely turned off. Press the iron over the towel for ten to fifteen seconds at a time. The controlled dry heat warms and slightly softens the binding resins.
- Immediately transfer several heavy, flat items—such as concrete pavers wrapped in cloth or stacks of ceramic tile—directly onto the warm seam. Leave the weights in place for twenty-four hours to hold the fibers down while the material cools and sets.
Replacing Blown Core Planks
Unfortunately, high-density fiberboard rarely regains its exact factory thickness once thoroughly soaked. When water breaks the internal resin bonds, the core blows out permanently, leaving a raised, chalky edge that wears away under daily foot traffic.
Never attempt to sand a bubbled laminate seam flat. Laminate is not solid timber; the decorative pattern is simply a printed photographic paper protected by a thin layer of melamine resin. Taking sandpaper or an electric planer to the seam will burn through the wear layer within seconds, exposing the raw, brown fiberboard core and ruining the floor visually. When bubbling is severe, replacing the compromised planks is the only viable solution.
Step-by-Step Plank Replacement for Severely Damaged Seams
If the bubbled plank sits within a few rows of an exterior or interior wall, the most reliable method is to remove the baseboard, unclick the boards row by row until you reach the damaged area, drop in a fresh plank from your attic stock, and reassemble the field.
However, when the damaged board is trapped in the center of a wide living room, disassembling dozens of rows is impractical. In that scenario, perform an isolated mid-floor surgical replacement.
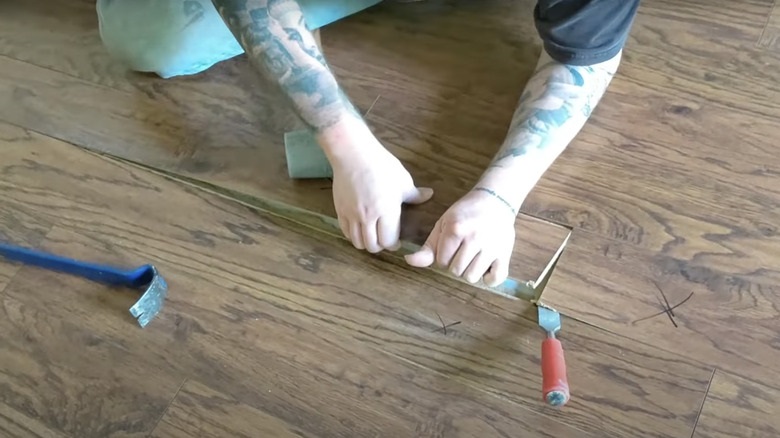
First, set the cutting depth of a circular saw or an oscillating tool to the exact thickness of your laminate plank. Make two parallel plunge cuts down the length of the damaged board, roughly one inch inward from each long side seam. Then, make a series of relief cuts connecting the two lines to form an “I” shape or an elongated rectangular cut-out.
Carefully lift out the center section of the board using a pry bar. Next, make four diagonal cuts from the interior rectangular opening outward toward each of the four corners, stopping just shy of the interlocking edges. This relieves the physical tension, allowing you to slide the remaining border strips inward toward the center and disconnect them from the surrounding intact floor without marring the adjacent tongue-and-groove profiles.
Once the damaged board is removed, clean the subfloor thoroughly with a vacuum:
- Take a replacement plank that matches your floor’s dye lot and style.
- Turn the replacement board over and locate the groove profile on one long edge and one short edge. Using a sharp utility chisel or utility knife, carefully shave off the lower horizontal lip of the groove. Removing this small lip allows the new board to drop straight down into the opening from above, bypassing the need to angle the plank into place.
- Test-fit the modified plank into the void without adhesive to verify that it sits completely flush with the surrounding floor.
- Run a thin, continuous bead of high-tack polyvinyl acetate (PVAc) tongue-and-groove flooring glue along the exposed edges where the new plank interfaces with the existing floor.
- Carefully drop the replacement plank into the floor opening, press it down until it sits completely level with the adjacent surfaces, and immediately wipe away any adhesive squeeze-out using a damp sponge.
- Place a flat board across the new plank and weight it down with fifty to seventy pounds of weight for a full twenty-four hours while the adhesive cures.
Long-Term Measures to Prevent Future Joint Distortion
Repairing distorted laminate joints requires careful execution, but preventing future damage is largely a matter of controlling environment and maintenance habits.
Keep interior relative humidity levels between 35% and 55% year-round. In dry winter months, use a whole-home humidifier to prevent excessive plank shrinkage; during muggy summer months, run air conditioning or dehumidifiers to prevent thermal swelling that drives peaking.
When installing laminate over concrete subfloors, never omit a continuous 6-mil polyethylene vapor retarder. Concrete constantly transpires moisture vapor, and failing to tape that plastic membrane beneath your underlayment invites chronic, widespread bubbling along bottom seams.
Finally, reconsider how the floor is cleaned. Ditch wet string mops and completely ban steam cleaners from laminate surfaces. The high-pressure, superheated moisture from a steam mop forces water straight past factory micro-bevels directly into the fiberboard core, virtually guaranteeing seam failure across the room. Clean using a slightly damp microfiber pad paired with a dedicated, fast-evaporating laminate floor cleaner.
Treating a floating laminate floor with an awareness of its structural expansion and moisture vulnerabilities keeps the field flat, quiet, and stable for decades of daily living.